I’ve been watching a lot of early American history documentaries lately, because they reassure me that as bad as things are right now, they certainly used to be worse in many ways: If you wanted a place to sleep, you had to build a house with your own goddamn hands, and it wouldn’t have any indoor plumbing. When a pandemic came around, the treatment might be leeches or shots of liquid mercury. I would choose a lifetime of 2020s over a single week in early America, because I know I wouldn’t make it. I’d last four days max.
Another thing that’s gotten me through the past few weeks has been pounds upon pounds of baked goods, and since I’m a bit of a culinary history buff, I’ve been researching historical recipes to fill my body with calories and gratitude. I like to ruminate on how these simple pleasures—made from little more than flour, sugar, butter, and fruit—were so much more than something you’d chow down on while screaming at a newspaper. These cobblers, crisps, pies, and pandowdies were a delicious incentive to get you through a long, hard day of spinning flax or trapping beavers.
Take, for example, the apple pie found in the recipe book of Fanny Pierson Crane of New Jersey, which calls for 12 ounces of dried apple rehydrated in equal parts hard cider and applejack whiskey. It’s the sort of thing that might provide comfort amidst the grind of daily life (not to mention the threat of cholera and typhoid). It’s also a reminder that society once revolved around cider because the water supply was full of brain-eating amoebas. Every bite of this pie is a reminder of our modern comforts, and with enough bites, it can also be a damn good time.
I decided to adapt Mrs. Crane’s original recipe into a pandowdy, which I find to be easier and, dare I say it, tastier than traditional pie. In a pandowdy, the filling is put into the pan first and the dough goes on top; halfway through the cooking process, the crust is cut (or “dowdied”), then gently pressed into the bubbling juices below. I scaled down the amount of whiskey Mrs. Crane called for because it seemed like a bit too much, but feel free to add more or less to your liking—as long as you use 2 1/2 cups of liquid to rehydrate the apples, you’re all good.
As for those apples: After the fall harvest, early Americans would cut them into rings, thread them onto a string hung near the hearth, and dry the slices to last all winter. Do not substitute fresh apples for dried ones in this recipe; they will not work. For the dough I like making my rough puff pastry, which bakes up soft and buttery on its underside but gets shatteringly crisp on top. Rough puff is much easier to make than you think, and I implore you to try it. Store-bought frozen puff pastry will work, too, but do yourself a favor and seek out the all-butter kind. In a pandowdy the crust is just as big of a deal as the filling, and you deserve the very best. After all, we’ve got a beautiful world to celebrate, and plenty to be thankful for.

Apple Whiskey Pandowdy
For the pandowdy:
- 12 oz. dried apples (fresh apples won’t work!)
- 1/2 cup applejack, or another American whiskey (if you prefer a non-alcoholic pandowdy, replace with regular apple cider)
- 2 cups apple cider (hard or regular, up to you)
- 2 tsp. vanilla extract
- 1 tsp. kosher salt
- 1 cup brown sugar
- 1 tsp. cinnamon
- 1/2 tsp. ground ginger
- 1/2 tsp. freshly grated nutmeg
- 1/4 tsp. ground cloves
- 2 Tbsp. flour
- 3 Tbsp. softened butter
- Egg wash (1 egg whisked with 1 Tbsp. water)
- 1 cup heavy cream
- Rough puff pastry, recipe below (if you prefer you can use store-bought, but I beg you to spring for the all-butter kind, as it makes a world of difference)
In a bowl, mix the dried apples with the applejack, cider, vanilla, and salt. Allow to sit for several hours, or overnight, to rehydrate.
Preheat the oven to 450 degrees Fahrenheit. Use 1/2 Tbsp. of the softened butter to grease the inside of a 10-inch cast iron pan.
Add the brown sugar, spices, and flour to the rehydrated apples and toss well. Pour into the prepared pan and spread out evenly, then dot with the remaining softened butter. Roll the puff pastry out into a 12-inch circle, place over the apples, tuck the edges into the sides of the pan, and press down gently so the dough is touching the filling. Use a sharp knife to make five small, randomly placed slits in the pastry (not the big grid cuts, those will come later). Brush the top with egg wash, and bake for 20 minutes.
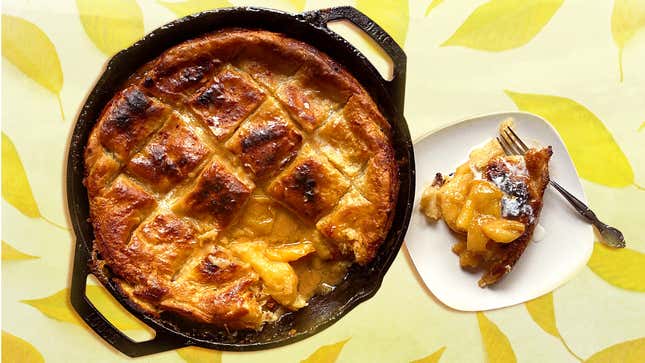
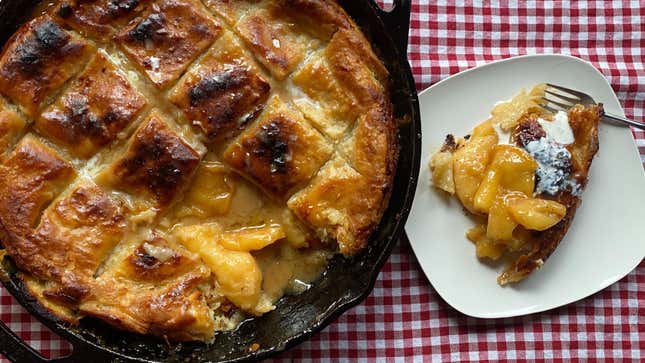
Remove the pan from the oven, then use a sharp knife to “dowdy” the crust, cutting it into large squares as seen in the photo above, gently pressing down so the apple’s juices can bubble up. Return to the oven for another 15 minutes, setting on a baking sheet to catch anything that might bubble over.
After 15 minutes, give the pastry another brushing of egg wash, then drizzle some heavy cream into the slits of the crust (you might not use all of it), then bake for another 5-10 minutes until the top is golden brown. Allow the pandowdy to cool for about 5 minutes, then once again gently press the top crust into the filling so it can absorb some of the juices. Allow to cool at least 5 more minutes before serving warm.
For the rough puff pastry:
- 2 cups all-purpose flour, plus extra for dusting
- 2 tsp. salt
- 1 cup (2 sticks) butter, cold
- 1/2-2/3 cup cold water
In a large bowl, stir together the flour and salt with a fork. Use a butter knife to cut the butter into thin pats, about 1/8" or so. As you cut, toss them into the flour, making sure they’re fully coated and not sticking together.
Add 1/2 cup of water while stirring, turning the flour into dough. Don’t try to smoosh up the butter! Just make sure there is no dry flour, adding more water if necessary. It’s okay if it’s a little on the wet side, as you’ll be adding more flour as you roll it out.
Lay out a large sheet of parchment on your counter (at least 2 feet) and dust the parchment, your rolling pin, and your hands liberally with flour. Plop the dough onto the paper and begin smooshing it out with your hands, dusting with more flour when it sticks (and it will be sticky!), then use your rolling pin to roll it out into a rectangle-ish shape about 1" thick (don’t worry about being perfect).
Fold in the shorter edges of the dough rectangle so they meet in the center, lifting the parchment to help you out. Pat down, and then fold it again once more across the center, like a book. Lift up the dough, flour the underside a little bit, then rotate it 90 degrees. Smack the dough with the rolling pin to flatten it out a bit, then repeat the rolling and folding process. Give it a few more good smacks with the rolling pin so it’s all sticking together, then wrap up tightly in the parchment and put it in the fridge. If you decide to make this well ahead of time, wrap it once more in plastic wrap. Store it in the fridge for up to three days, or freeze for up to six months.